Optimise WordPress Website to reduce page size, improves the overall site’s performance to pave the way to a great user experience.
Install W3 Total Cache

To install the W3 Total Cache plugin, open your WordPress dashboard, followed by Plugins > Add New. Search for “w3 total cache” and install the first result. You can also manually download the plugin and upload it to the wp_content/plugins folder via FTP. If you have previously installed another caching plugin like WP Super Cache, you should disable it before activating W3 Total Cache. This would prevent the two plugins from conflicting. As a rule of thumb, don’t keep more than one WordPress caching plugin activated at any given time.
Optimise WordPress Website: Configuring W3 Total Cache – General Settings
W3 Total Cache creates a new menu entry called Performance in WordPress dashboard. The options that we’re looking for are under Performance > General. You’ll notice that this page has an overwhelming number of settings for a caching plugin (and a whole lot more if you’re into advanced stuff). Each setting is placed inside a box – called modules. I’ve discussed each of these modules with relevant screenshots. If you get stuck or are uncertain about a particular setting, simply follow the screenshots.
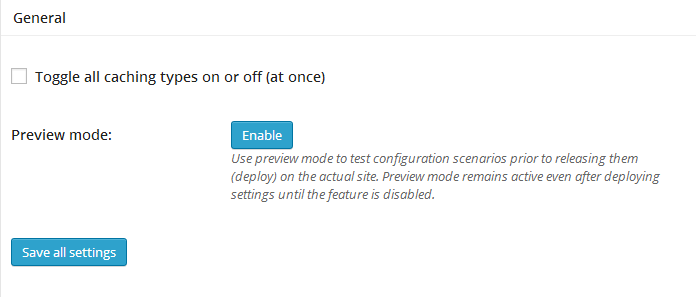
The first module you’ll find is General. I’d recommend not to enable the all the caching options using the toggle checkbox. You might turn on settings that aren’t required (or even supported by) your host – which would inadvertently slow down your website. However, if you want to quickly disable all the modules, this toggle checkbox comes in handy! Before we proceed further, if you’re unfamiliar with the terms ‘page cache’ or ‘database cache’, I would recommend reading How WordPress Caching Works.
Optimise WordPress Website
Page Cache Module
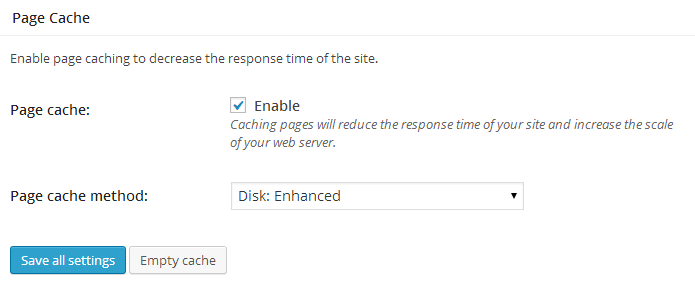
The second module we’re going to configure is Page Cache. The Page cache method depends on your hosting environment. If you’re using a shared host, Disk: Enhanced is the best option. However, if you’re using a dedicated or virtual server and you have APC (or any other form of Opcode caching installed), you should select the respective option.
Minify Module
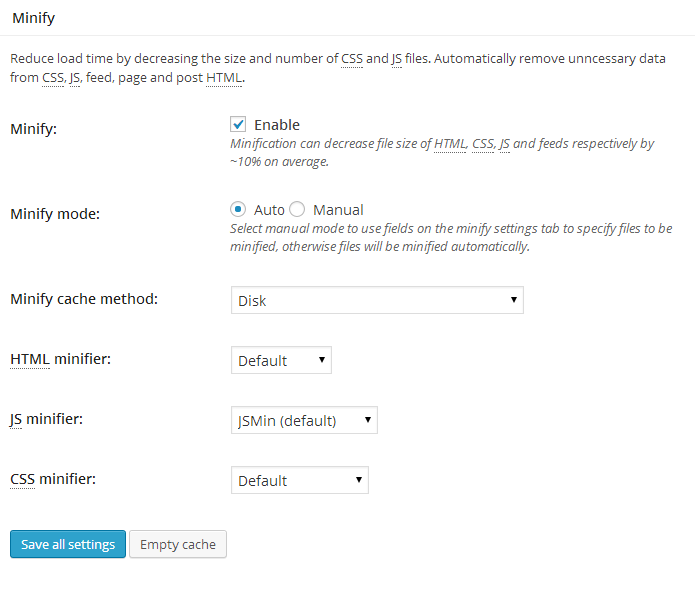
The Minify module compresses the CSS and JavaScript files your theme uses, by removing unnecessary lines of code like comments and whitespaces. This reduces the filesize by ~10% which results in a faster site. Under Minify cache method you should select the appropriate option based on your server.
Other Caching Modules
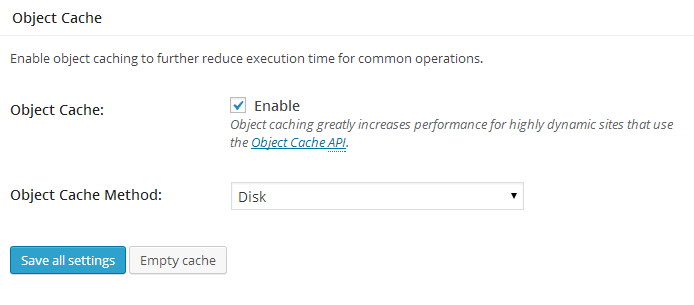
The next two modules are Database Cache and Object Cache. Enable each of them and change their caching method to the one best fit to your hosting environment – just like you did under Page Cache and Minify.
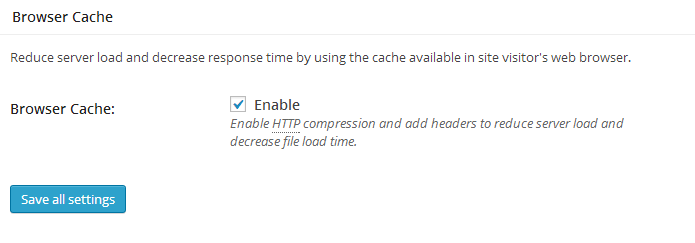
The last module that we want to enable is Browser Cache. Once you’ve enabled them, click on Save all Settings. That should do it! W3 Total Cache is now enabled in your server. We will now take an in-depth look into two specific modules – Page Cache and Browser Cache. The rest of the modules’ default values are just fine.
Optimise WordPress Website
Page Cache Settings
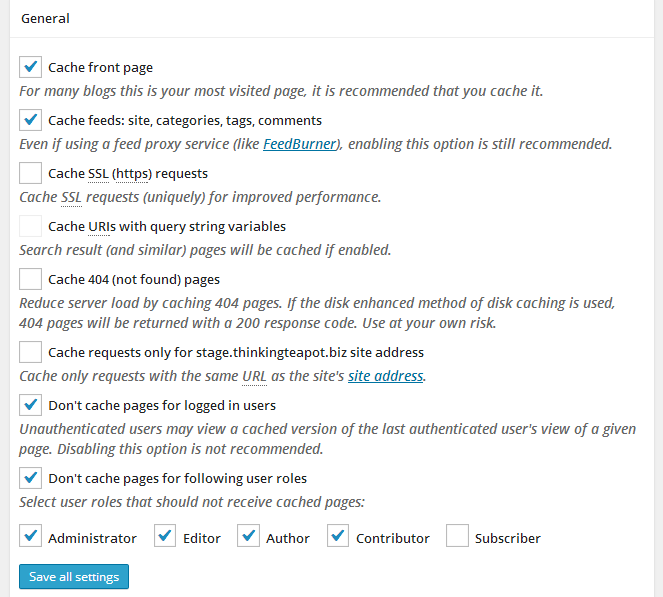
The Page Cache settings can be found under Performance > Page Cache. The settings here are fairly self explanatory. I’ve enabled a couple of them – specially Don’t cache pages for the following user roles. This ensures that when an author is editing a post, he/she will able to view the latest version and not the one from the cache.
Preloading the Cache
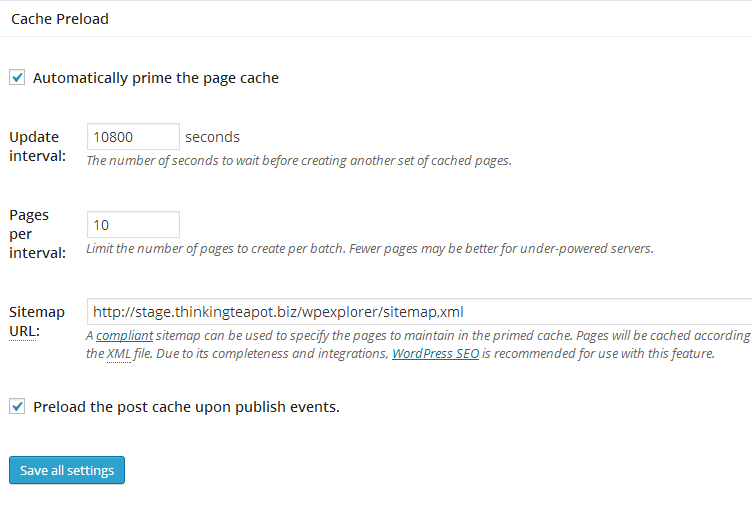
By default, W3 Total Cache caches a page when it is first requested. You also have the option to pre-generate copies of all the posts/pages. This way, regardless of when a visitor requests a page, the cache is ready and the page is served in the lowest possible time.
https://geewealth.com.ng/boost-your-business-with-customized-website-development/
You should configure the cache preload settings based on your hosting environment and the amount of traffic your website receives.
- The cache Update interval directly affects server resources – lower the time interval (i.e. higher the frequency), greater the server resource consumed. People on shared hosting servers should be very careful with this setting. Set a high enough frequency and you might just get your account suspended for abuse of server resources. A safe cache preload interval is one hour – i.e. 3600 seconds.
- If you’re unfamiliar with the Sitemap URL, install Google XML Sitemaps. It’s super easy to use and is in fact, a must-have plugin.
- Finally, you want to enable the last option which will trigger a cache preload operation when a post/page is published.
Browser Cache Settings
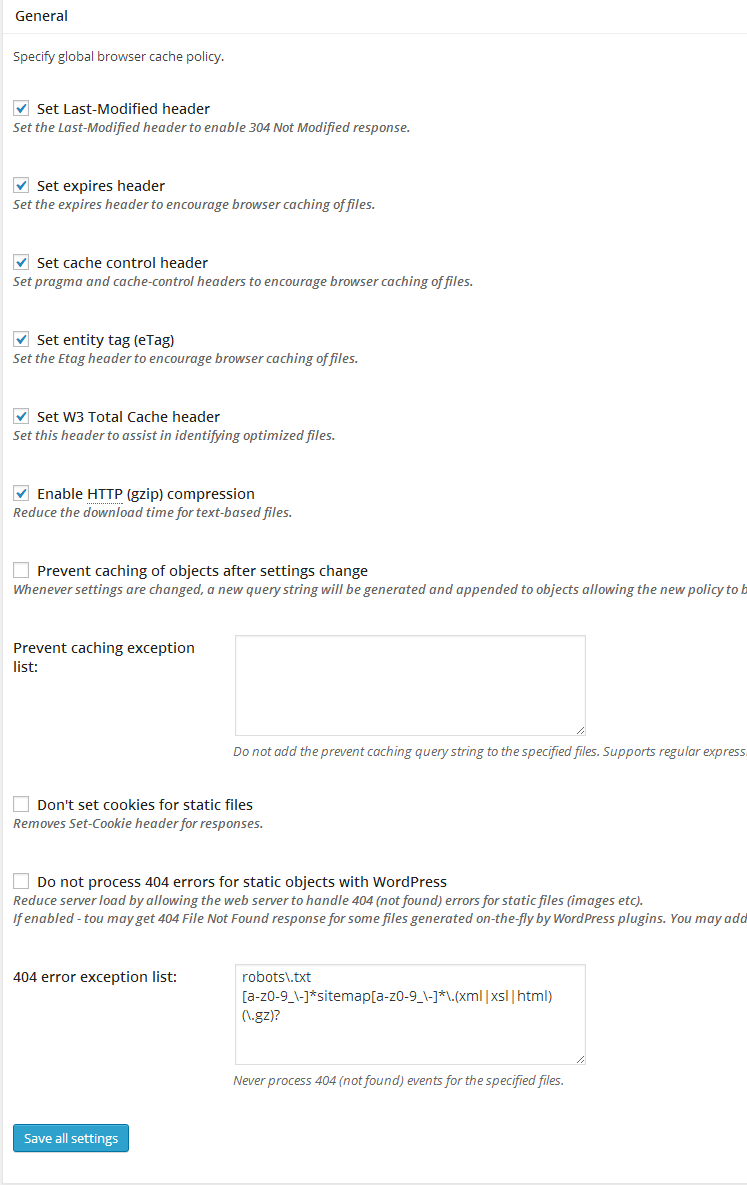
This is found under Performance > Browser. The idea is to leverage your visitor’s device. Enabling Browser cache would make the static files (such as CSS, JavaScript and images) to be served from your visitor’s browser cache. Of course, there’s an expiry time which would prevent the use of obsolete data. This removes a huge load from the server, saves bandwidth and greatly improves your site’s overall performance.
It’s Alive!
How do you know that W3 Total Cache is actually working? Well, the plugin page says so. You can also view the source code of your site find something like this:

W3 Total Cache Performance Benchmark

I waited around 1 hour after I enabled caching and benchmarked the website’s performance using GTmetrix. This is without any caching plugin:

This is one hour after W3 Total Cache was configured:

Notice the difference? A 3% and 5% increase in Page Speed and YSlow Grade. Neat, right? Now imagine a thousand people visiting your site daily – imagine the amount of CPU cycles (fancy term for resource usage) you’ll save. Caching not only reduces you page size, but it also improves the overall site’s performance which paves the way to a great user experience.
